How To Draw For Beginners
Anybody can draw!!!
Drawing Made Easy For The Absolute Beginner
Cartoons are fun. Well almost. If you are like me you certainly love to watch cartoon figures. But drawing cartoons is another story particularly if you are not aware of the basics.
If the thought of creating beautiful cartoon characters gives you high, read on, here you will find some tips that you can readily use to improve your skills and reduce the time taken to create beautiful cartoon characters.
There are certain things that are same for every style of drawing, be it realistic drawing or cartoony, now we will go quickly through the basics before getting specific to cartoony style.
1. Select your tools wisely. Clean your hands before starting your drawing. The paper you use for your work should be of good quality. Low grade, off colored paper will make your drawing look pale. Your first sketch should be made with light lines and for finalizing you should use deep-colored and prominent lines –so choose your pencils carefully.
2. Many times beginners find drawing a smooth line difficult. Remember drawing smooth lines will be easier if you do not support your hand on your wrist like we are used to do while writing. Doodling and drawing some circular shapes just before you start will also help you to draw smoothly.
3. Learn to draw facial features and hand carefully. Hands are more difficult. Experts often judge a persons drawing ability from how well he can draw human hands. So practice drawing hands with care.
4. Study about basic forms and proportions of human body. Learn about basics of human anatomy and various ratios of human figures.
As a cartoon creator you will have certain liberties, you do not need to bind yourself with strict body proportions rules. You can draw four fingered (Thumb + Three) hand that makes your work a bit easier.
But one challenge you will face while drawing cartoons –cartoon characters needs to be more expressive and certainly you have to create this expressiveness with some lines drawn with your pencil.
Keep in mind that three areas of human face that play major role to express emotions are
1. Eyelids (wide open, half closed, almost fully closed etc.),
2. Eyebrows (raised, normal, crooked etc.) and
3. Lips (forming downward bow, upward bow etc.).
Other than these you can also use, hair (properly combed or ruffled), garments (well kept or torn) to create characters that tells a story.
Hope you find this tips useful. Coupled with some practice these tips will help you to take your cartoon drawing skills to a new level. Enjoy the fun of drawing beautiful and expressive cartoon characters.
If you’re going to be doing any pencil drawing you’re going to need a pencil. I know, I know, thank you captain obvious…. But, in this article I want to talk about some of the different options available.
Here are some of the options:
Mechanical Pencils, Lead Holders, Woodless Graphite, And ofcourse traditional wooden pencils
Mechanical Pencils: You’re probably familiar with these. They’re the ones that hold the lead (graphite actually) inside and when you push on the eraser more lead comes out. What you may not know is that, like traditional wooden pencils, the leads are available in various degrees of hardness which can be used to achieve lighter or darker tones as needed. We’ll talk more about that later.
Lead Holders: These are somewhat similar to mechanical pencils in that you can use various leads with them. But rather than push a button to release more lead, these pencils actually have sort of a claw that grabs onto and holds the lead. Hence the term “lead holder”.
Woodless Graphite: These pencils are basically a piece of graphite in the shape of a pencil. There are also some woodless graphite pencils that are encased in a laquer coating rather than wood.
Wooden Pencils: Okay. We all know what a wooden pencil is. It’s the yellow one with a pink eraser on top and a number 2 on it. You know, the ones we used to fill in the little circles on our multiple choice tests in school.
Well yes, those are pencils, but a set of good quality drawing pencils comes with a lot more variety than that. All of the pencil types mentioned above come in varying degrees of hardness and are labled with a number and the letter H or B. The pencils labled H are on the hard side and the ones labled with a B are the soft ones. I don’t know where the “B” comes from but that’s the way it is. Pencils range from 9H (the hardest) to 9B (the softest).
The number 2 pencils we’re so familiar with are right in the middle in terms of hardness. They’re equivalent to an HB pencil. If you’re just starting out drawing or you’re just doing some doodling or sketching an HB or #2 will work just fine for you. But, if you want to get a much more interesting drawing you’ll have to have some contrast between lights and darks. If all you’ve ever drawn with before is a number 2 pencil, the way you achieve your darker tones is simply to press down harder.
But there is a better way. That’s where the softer pencils come in. After #2 in terms of softness comes B then 2B, 3B ect. all the way up to 9B. Although many artists never use anything softer than a 6B. With a 6B you can get some very dark tones and it’s not going to be as soft and thus crumbly as a 9B.
For the harder pencils, I rarely use anything harder than a 2H and that’s usually just for the initial line drawing before any shading takes place. Doing the initial line drawing very lightly allows you to erase any mistakes you might have made. Once your line drawing is acurate, it’s time to get the softer pencils out and start shading.
So to wrap this up, if you’re planning on getting a little more serious with your drawing you’ll want to get a set of pencils. There are some sets out there that have just 4 pencils in them. So if you’re strapped for cash this is an option. Pencils are also available individually so you can pick and choose whichever number / letter combo you need.
I prefer traditional wooden pencils for my drawings and my brand of choice is Derwent. They make sets of 12 pencils that range from 4H to 6B or from H all the way up to 9B. And, you can get a set of 12 pencils for about $12 – $15 so it’s not terribly expensive to get into drawing.
So now go out, get yourself some good pencils, and start drawing….
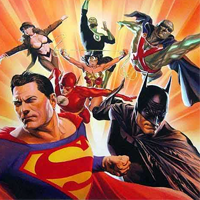
With the variety of comic books on the market today no wonder so many young people have decided to enter the comic book art market. There are never ending opportunities in this field and you do not have to be a natural to make it happen.
Artist’s workshops
Comic Book artist workshops are designed for anyone that would like to get into the market for comic book art. They will have the chance to learn the secret language of chronological story telling in comics.
While having the opportunity to create characters and tell stories through pictures, they can grow in a direction that will teach them about the many forms of communication. Learning to draw from imagination or from real life experiences, you can turn these experiences into comic book stories and learn to express those ideas in the very best ways.
Online comic book art workshops
The best way to attend a workshop is online, as the workshop is completed in the comfort of your home and you will be able to find one that suits your needs. Workshops can be found by searching keywords, such as online comic workshops, workshops for artists, etc.
Offline comic book art workshops.
There are also many offline workshops, offered through local universities and art schools. The best ways to locate these are to contact those places and ask when the next comic book art workshop is available.
Teach yourself comic book art
There are also pdf courses you can download to teach yourself how to create comic books and art. The six-lesson course is a great way to start if you do not have the funds to go take a comic book art class or workshop.
Figure drawing is challenging. The act of rendering the human form accurately on paper can be intimidating and frustrating if you try to tackle everything all at once. It is for this reason that you should take things one-step at a time and most importantly, practice! The following article will provide you with some of the basics for understanding how to approach your next figure drawing project.
The very first thing you will need obviously is your drawing supplies. Drawing does not have to be a very expensive art form. You can get started with a pencil and paper if you so desire, but there are certain supplies that will produce better results. It is quite difficult to recommend the perfect materials as every artist is different and therefore will have different preferences. Only time and experience will tell you what materials work best for your particular style. Your choice of materials will also depend on the chosen subject matter.
The best advice would be to get a variety of different pencils and papers and simply experiment. You will eventually come to like certain materials over others. Get your self a pad of newsprint paper. Newsprint paper is fairly inexpensive and excellent for practice drawings, although you should not expect these drawing to last very long. They will more than likely yellow over time. For your permanent drawings, a good quality paper is recommended. Strathmore is a good brand to look into. You may want to start with a medium textured paper as it has enough “tooth” to hold a fair amount of medium, but smooth enough to allow for detailed work. You will also need a good size drawing board that is smooth and flat for your drawing surface.
Before you even lift a pencil, you should have a basic understanding of human anatomy. When you study anatomy, you will learn more about the construction of the human body and its proportions. You will also have a basic understanding of the muscles and tendons and how they direct and control the body. There is no need to get carried away and memorize every muscle, bone, and tendon in the human body; just a fundamental understanding should suffice.
Getting the proportions correct in your figure drawing is one of the biggest challenges you will face as a beginner. It is for this reason that a unit of measurement was established using the models head. This is the distance from the top of the head to the bottom of the chin. 7 ½ to 8 heads is the standard measurement that has been developed for the height of an erect figure. This measurement can vary depending on the subject so you may have to make adjustments to your figure drawing. You should realize that the measurement of 7 ½ heads corresponds to the figure when it is standing erect. If the pose of your figure changes, adjustments will obviously have to be made.
Artists will often use a pencil to take the head measurement. Stand a reasonable distance from your subject. Grab your pencil from the bottom as if you were holding a hammer and extend your arm out fully in front of you toward the subject. Try and keep your head as still as possible. Make certain that you are standing in the same spot each time you take measurements. Now closing one eye match the tip of the pencil with the top of the subjects head. Place your thumb on the pencil and slide it down until it matches with the bottom of the subjects chin. You now have taken the “head” measurement of your subject, which will now serve as a reference for measuring the rest of your subject.
When deciding on the type of pose for your figure drawing make sure you choose one that looks natural. Your model will be holding his or her pose for a long period of time and should be comfortable and relaxed. Give your model adequate time to move around and get settled. The more relaxed and natural the pose, the more believable the final drawing or painting will be. If your model looks uncomfortable or awkward, your painting or drawing will reflect that as well.
There are number of different lighting situations that you can create for your figure drawing or painting. Will you be working indoors or outdoors? If indoors, will you be working in a room that has natural sunlight or will you be using artificial light? What direction will the light source come from? Will there be multiple light sources? If you are a beginner, you may want to create a lighting effect that strikes your model from only one direction and illuminates your figure only partially, thereby creating more shadow. This will make for a much easier figure drawing. As you gain more experience, you can then move on to more complex lighting effects.
When you begin your drawing, you should not be overly concerned with getting every detail correct in your figure or other objects that make up your drawing. Many beginners fall into this trap and ultimately wind up with a drawing that is out of proportion or that just looks wrong. Study your subject, squint your eyes and try to locate the basic shapes that make up your subject.
Figure drawing and painting is a vast subject and this article only touches on some of the basics. You should definitely take classes or workshops and practice your figure drawing with live models. Purchase a few good books on figure drawing and anatomy. Join discussion groups and ask questions. Most importantly though, keep practicing and never give up.
Henri Cartier-Bresson is reported to have said after he had given up photography. “All I care about these days is paintingphotography has never been more than a way into painting, a sort of instant drawing.”
No one disagrees that painting is art, albeit the quality may vary but it is always considered art. Why isn’t this the case with photography? It is agreed that there is an art to photography but this means it is a craft but photography of the highest order is referred to as “photographic art”. Likewise images created on or enhanced by a computer are labelled as “digital art” or “computer art”. Whereas painting is just art, be it water colour, oil or acrylic.
In part the problem lies with the artist. The discussion about photography is littered knee deep with technique and coloured with technical jargon. Seldom if ever is the art discussed. I have yet to find a discussion about a painter’s work where the types and sizes of the brushes scores a mention. And quite frankly who really cares? If I was to twiddle the knobs like Ansel Adams would I make an Adam’s photograph? The simple answer is no, I’m not Ansel Adams.
The photographer makes the photograph with their attitudes, opinions, experience and aesthetic. The very same attributes that the painter brings to their work, as does the sculptor, the writer or the composer. Technical ability only makes technically correct work. The most interesting work is that which is out there pushing the boundaries, ignoring the rules and making it up as they go along, finding new forms of expression.
The development of the digital darkroom heralds a new age for photography. Gone are the days of mechanical drawing, now full blown paintings are as accessible as the artist’s ability to imagine them. With attitude, opinion, experience and aesthetic being the guiding principles not the recipes of those who have gone before.
It is a play ground, don’t worry about mistakes it is through them that we learn. As one of the greatest artist’s of the 20th Century, Pablo Picasso, said, “Every child is an artist. The problem is how to remain an artist once he grows up”.
Cartooning is not about drawing it is about telling stories. Yes, even when you are drawing a single illustration you are telling a story. Cartooning is about expressing your thoughts. And it is your thoughts expressed beautifully through your cartoon characters that make you different from other average cartoon makers.
But as in every other field of life here also you must learn to walk first before you try running. To express your thoughts and ideas through your cartoon characters, you need to master the skill of cartoon drawing first. Then of course you can use your cartoon drawing skills to tell story to your liking.
To be skilled in cartoon drawing you have to face a learning curve. You just can’t decide to be a cartoonist then copy some popular cartoon figures and become an accomplished cartoonist who is rich and famous. If you are lucky and talented with keen sense of observation you may pickup one or two tricks by making copy of popular cartoon figures. But that is too inadequate to be of any use.
There are various ways that you can take to learn cartoon drawing –you can join cartooning school or take a home study course or follow a book of an expert cartoonist — the bottom line is you have to follow the steps. Like you should first teach yourself drawing 3d shapes, then learn to stretch, squash those 3d shapes in your drawing. Next you need to practice things like drawing hands and head before moving on to motion and emotion and advanced things like that.
If it sounds like lot of work, you are right. But what you achieve at the end is worth working for. If you are smart however you can use the tips you are going to discover here to make the whole learning process fast and painless.
1. Do not start with computers. I agree I run the risk of sounding backdated. But here I am not opposing usage of computer altogether, no sane person can do that. But for beginners there is no alternative to using paper and pencil.
There are various software that help you so much that you can go ahead even without learning how to draw a smooth line. This kind of over dependency on computers from the very beginning always backfires down the road.
2. Nail the fact in your mind that construction of human, animal, cars and most of the things that that we see around us are complex 3d structures though we draw them on paper which is 2D. So when drawing you must mentally analyze your model in terms of 3d shapes like spheres and boxes and not in terms of 2d shapes like circles and rectangles.
Also when you draw something from paper (i.e. 2D), look for and find out the 3d shapes that make up the character.
3. Most of the cartoon drawing or figure drawing tutorials always start with some basic 3d shapes and after a number of steps end up in a complete and beautiful figure. This technique is very effective in learning how we can draw complex figures starting with simple shapes. But what I am going to tell you will make your pace of learning even faster. It is in fact very simple way of using the same tutorial. Just a lot more effective.
What you need to do is start where the tutorial ends and go backward from there. See the completed figure and try to recognize the ingredient basic shapes. And compare your analysis with the exact shapes that are used in the tutorial.
This will give you a very through exercise in recognizing the basic shapes. And after some time you will be analyzing the real life around you like an expert. Just take your time and practice this technique, and see how fast it will improve your skill in cartoon drawing.
Cartoon drawing is pure fun both for professionals who earn their living through cartooning and hobbyists who draw cartoon only for personal pleasure. I do not know what you goal is but hope the tips here will be helpful for you. Never stop learning: there are a whole lot to learn and even more fun to have in the process. Happy journey!
Drawing is a wonderful art form in itself, but it is also an excellent exercise for other forms of art, like painting for instance. Learning how to draw will truly open your mind to your surroundings enabling you to really see what is before you.
Choosing your drawing supplies there are a variety of different drawing tools available for today’s artists and what you choose to work with is based on your own preference. It comes to down to experimentation. You have to work with a number of different things before you find the tools that fit your style of drawing.
Don’t go out and spend a ton of money on your drawing supplies in the beginning. You can really get started with a beginner pencil set and some newsprint paper. When you become more experienced, you can then venture out and spend money on better supplies.
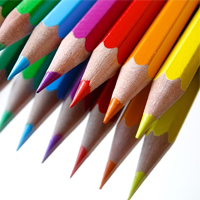
Graphite pencils – Graphite pencils range in hardness and are labeled from 9H to 9B. The H pencils are the hardest. The higher the number in front of the H the lighter the mark. The B pencils are softest. The higher the number in front of the B the darker the mark. The H pencils are generally used for detailed lines where the B pencils will produce rich dark lines great for bold expressive drawings.
Charcoal Pencils – Charcoal pencils also come in a range of hardness and are labeled either from H to B like graphite, or simply as “soft”, “medium” or “hard”. They have a noticeably different feel to them and produce a rich dark line. Charcoal pencils tend to wear pretty fast because of their softness.
Blending Tortillions – Tightly wound stumps of paper with a point used to blend in your drawings.
Erasers – You may want to have a few different types of erasers on hand to fit every occasion.
Kneaded Eraser – A soft pliable eraser that can be kneaded into any shape to pick up and remove pencil and charcoal. May not be the best for erasing smaller details. The SANFORD Kneaded Rubber Erasers are very popular.
Eraser Pencil – These are wonderful for getting into small areas of your drawings. They can also be sharpened like ordinary pencils.
Fixatives – Fixatives protect your drawings from being smudged or ruined. There are two types of fixatives: permanent and workable. Permanent fixatives are used on a finished drawing to protect, where a workable fixative is used during the drawing process as you are working. Use great care while working with fixatives by only using in a well ventilated area. When spraying the fixative, make sure you do not spray any one section for too long and only spray a light mist standing about 3 feet away from the drawing. You should probably experiment on a few practice drawings first to determine if a fixative is right for you. There appears to be a difference of opinion amongst artists when it comes to fixatives. Some artists love to work with them and swear by them, while others feel they may actually alter the quality of a drawing. Again, you have to experiment yourself to see if fixatives are a good choice for you.
Paper – In the beginning, for the purpose of practice, you may want to consider purchasing some inexpensive newsprint paper. You should be able to get this at any local art store or online. When you are ready to purchase a more expensive grade paper, choose something that will work best with the medium you use. Paper comes in a variety of different textures from smooth to rough, often referred to as its “tooth”. A really smooth paper may not work well for some mediums as the surface lacks texture, and will not grab certain drawing mediums very well. If the paper is too rough, the medium may simply slide across the surface. You have to experiment with different papers to find the one you are most comfortable with. Strathmore Brand makes excellent paper that is very popular amongst artists.
Horse Hair Drafting Brush – You should be able to purchase a horse hair drafting brush at any local art supply store or online store. This is a really helpful tool for brushing away unwanted eraser scraps from your drawing.
Basic Drawing Techniques:
There are two basic ways to approach a drawing: linear and tonal. The linear approach to a drawing focuses on line and outlines of shapes. In tonal drawing, you make use of gradations to indicate the various planes of your subject.
You should try to avoid smudging and blending in the beginning so that you force yourself to use your pencil more to achieve value in your drawings.
Avoid looking at your drawing too often. Make sure you are constantly focusing on the subject and only glancing at your drawing. By doing so, you won’t constantly judge your drawing, or think something is
wrong or out of place. Focus on the subject and draw what you see.
Never throw out any of your drawings. Keep a neat portfolio of everything you draw. This is an excellent way to see your progress over time.
Holding the pencil – Hold your pencil in a way that is most comfortable for you. Some hold the pencil just as you would hold a pen or pencil if you were writing. Others hold a pencil with the pencil between the thumb and index finger, with the rest of the pencil resting under the palm of your hand. Whichever method you use for holding your pencil, make certain that you do not hold the pencil too tightly.
Contour Drawing – This very basic technique is simply drawing the outline of your subject without any shading to indicate form.
Blind Contour Drawing – Similar to contour drawing, only you do not look at the paper. The point of this exercise is to force you to better observe what it is you are drawing. You should have no concern over the outcome of your drawing so it is important not to peek.
Hatching – This drawing technique uses a series of parallel lines drawn close together, in the same direction, which gives the appearance of value.
Crosshatching – Similar to hatching only you draw multiple layers of hatch lines at different angles that overlap one another.
Tonal or Value Drawing – In this approach to drawing we are indicating the various changes of light and shade in our picture without the use of strong edges and lines.
Upside Down Drawing – Drawing upside down is a wonderful exercise to awaken the right side of your brain. When you turn an image upside down, you are making it somewhat abstract and unrecognizable. This forces you to draw what you see as opposed to relying on your memory to draw something.
Negative Drawing Technique – This technique teaches you how to properly see the “white” or “negative” space in your picture. This is the area that surrounds your subject or “positive” space. Instead of drawing out the positive part of the drawing with line, you draw in the shapes that surround the positive part of your drawing.
Dry Wash Technique – This technique works quite well if you want to cover large areas of your drawing. It creates a nice soft tone. You begin by adding marks with a pencil or apply some graphite powder to the desired area on your paper. Then using a tissue or soft cloth pick up some of the graphite and gently rub it across the paper, almost as if you were painting.
Learn How to Paint, Draw or Write Like a Pro with Continuing Education Classes
Have you ever wanted to be an artist? Most of us have at one point of our lives or another. However, in school, the focus was more on reading, writing and rithmetic instead of honing our artistic or musical skills. Now that you are an adult and can make your own decisions, you’d like to try and learn these things and take up a new hobby. But how? Do you read a book or ask your friend who paints?
Well, you can, but it won’t help you get the know-how that taking a continuing education course can give you.
Continuing education courses can be anything from an accredited degree program (one where you earn a degree to use in your career at the end) to a simple day-long course at the local community college. However, it’s those simple courses that can give the students amazing experience in areas they never had a chance to learn about previously.
A student can take painting classes, learn to sew or knit, learn to arrange flowers or research your family tree-all by taking a few courses for a few weeks. You can learn how to create the next big piece of artwork or sew your daughter’s wedding dress. Or, you can do something simple. Continuing education courses have something for everyone.
Because the topics can range so widely, these continuing education courses are a great way for retirees to keep their minds sharp in their senior years. It also gives them a way to meet people with similar backgrounds and interests.
So, if you are itching to get started on that painting you’ve always dreamed of creating, now is the time to get started. Why now? Because, well, why not now? There is no better time than the present to start living your dreams, no matter your financial background or martial status. You will also find that pursuing your interests will help you with your self-confidence, self-esteem and general happiness in your life.
Where can you find continuing education courses like these?
Well, first start by calling your local community college or recreation center. Nearly ever town or city has at least one and they are sure to offer a few each month that will serve your interests.
If you can’t find continuing education courses at your local community college, head online. Search on your favorite search engine for continuing education courses in your city or region. You are sure to find a great selection to choose from, probably in places you weren’t aware of before. Then, all you have to do is register, attend class and let your mind soak up the new information. It can be that easy!
Living your dreams of becoming an artist or clothing designer doesn’t have to be only a dream. You can make it a realitywith only the tuition payment and some imagination. Just think, maybe someday you can pass on your knowledge to others and help them start living their very own artistic dreams too.
A child’s first scribbling is something which it tries to express if you give a pencil in his hand. Drawing is relatively very simple and an easy skill and is something with which you can have great fun. It is also relatively not a very expensive hobby and can start with paper and a pencil. It can go on till acquiring costly pen and tablets – a computer hardware through which you can draw on your computer. It is very costly; however the precision for perfection is very high.
Unlike earlier days, getting information on drawing and sketching is very easy and inexpensive. You can search information on Google and get various sites which teach drawing. Also, nowadays this art form is liked by many youngsters. Like all other art forms, with constant and systematic practice one can become a great artist.
Listed below are few drawing tips which can help anyone improve their skill and become an artist. Reading and practicing these in your daily routine will improve your skill.
1. If you are drawing and you are right handed person, ensure that the light is from your left side. This will prevent your hand shadow falling on your paper.
2. First step when you practice drawing – you should practice drawing line, straight line, curved line, scribbled lines, and your hand should obey the command of your thoughts and visions. You should control your hand and you should be able to bring out what you want.
3. You should further develop drawing circles, oval shapes, crossed lines and bold and thick lines. Just like how a baby develops from crawling stage to walking stage, your art should also develop step by step.
4. These lines and curves are like pillars to a building. The foundation should be strong enough to have a good building; similarly these initial small lines and curves will go a long way in your career. You should also start controlling the stress on your pencil. You should be able to bring the correct darkness and thickness in the lines what you draw.
5. Initially you will not be able to draw a circle or an oval shape correctly, nevertheless don’t get discouraged. You should practice and practice until you get perfection. You should also keep all your drawings carefully from the start to know how you are improving. You could also date your sketches and preserve it for the future.
6. You should concentrate in the area where you feel you are weak. If you are not able to shade properly then learn more to do that. You can try out your own style of shading. Build your own individuality, never copy from another artist.
7. Last but not the least, use good quality materials. 4B and 6B pencils and good chart paper or note book with good quality paper should be sufficient to start with. Quality definitely matters hence never compromise on quality.
If you are a person who is interested in learning to draw you will be interested to check these Free Drawing Tutorials and also can search for tutorials from drawing search engine.